

The aroma of freshly baked bread is a siren song, pulling you into the kitchen with its warm, comforting embrace. Imagine the crusty exterior yielding to a soft, tender crumb, each slice imbued with the subtle sweetness of honey and the wholesome chew of oats. This isn’t just any bread; this is a journey to baking bliss, culminating in the most delightful homemade Honey Oat Sourdough Bread you could ever dream of. Forget those store-bought loaves; today, we embark on an adventure that promises a rewarding bake and a loaf that will make your taste buds sing. Prepare for the ultimate sensory experience as we transform simple ingredients into a masterpiece.
- Crafting this sourdough loaf is a wonderfully meditative experience, offering a gratifying process from starter to a golden, crusty finish.
- The nuanced flavor profile combines the tangy depth of sourdough with the comforting sweetness of honey and the hearty texture of oats.
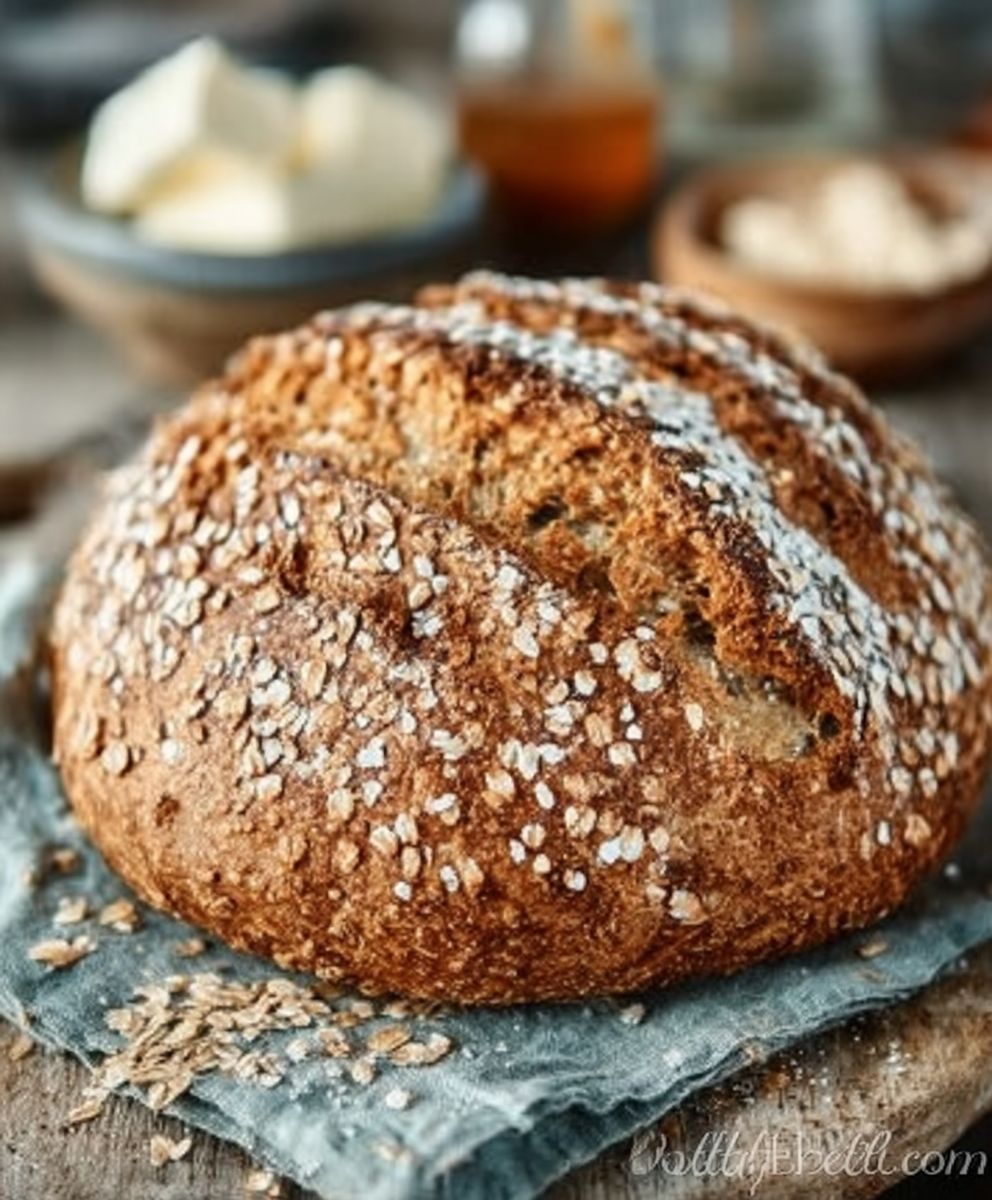
- Visually, this bread is a rustic masterpiece, with a beautiful golden crust, inviting texture, and delicate scoring that impresses every time.
- Its versatility shines, perfect for breakfast toast, savory sandwiches, or simply enjoyed with a pat of butter, making every meal special.
Ingredients for Honey Oat Sourdough Bread
Here’s what you’ll need to make this delicious dish:
- Active Sourdough StarterA bubbly, fed starter is the heart of your bread, providing the essential yeasts and bacteria for rise and flavor.
- Warm WaterUse filtered water, ideally around 90-95°F (32-35°C), to properly activate your starter and hydrate the flour.
- Bread FlourHigh-protein bread flour gives your loaf structure and chewiness, crucial for a good sourdough texture.
- Whole Wheat FlourA small amount adds depth of flavor and nutrition, complementing the rustic profile of the oats.
- Rolled OatsChoose old-fashioned rolled oats for their texture and wholesome contribution to the bread’s crumb and crust.
- Pure HoneyOpt for good quality honey; it provides natural sweetness and helps with crust browning, giving our Honey Oat Sourdough Bread its distinctive taste.
- Fine Sea SaltSalt is vital for flavor development and also plays a role in controlling the fermentation process.
- Melted Plant-Based Shortening or Butter AlternativeA touch of fat enriches the crumb and helps achieve a tender texture.
The full ingredients list, including measurements, is provided in the recipe card directly below.
How to Make Honey Oat Sourdough Bread
Follow these simple steps to prepare this delicious dish:
Step 1: Hydrate and Autolyse
In a large mixing bowl, combine your active sourdough starter, warm water, honey, rolled oats, and the whole wheat flour. Mix these ingredients until just combined and no dry spots remain. Cover the bowl with a damp cloth or plastic wrap and let it rest for 30 minutes to 1 hour. This “autolyse” phase allows the flour to fully hydrate and gluten development to begin naturally, making the dough easier to work with later.
Step 2: Incorporate Remaining Ingredients
After the autolyse, add the bread flour, salt, and melted plant-based shortening to the dough. Using your hands, mix until all ingredients are thoroughly combined and the dough comes together in a shaggy mass. It will feel sticky, which is perfectly normal. Resist the urge to add more flour at this stage, as over-flouring can lead to a dry loaf.
Step 3: Bulk Fermentation and Stretch & Folds
Cover the bowl again and let the dough rest for 30 minutes. Over the next 2-3 hours, perform a series of “stretch and folds.” Every 30 minutes, gently stretch a portion of the dough up from the bowl, then fold it back over itself. Rotate the bowl and repeat this 3-4 times until you’ve worked your way around the dough. This process develops gluten and strengthens the dough without heavy kneading. After these folds, allow the dough to continue fermenting at room temperature until it has increased in volume by about 30-50% and feels light and airy. The exact time will depend on your kitchen temperature and starter activity, typically 4-6 hours.
Step 4: Preshape and Rest
Gently turn the dough out onto a lightly floured surface. Carefully preshape the dough into a loose round or rectangle, being careful not to deflate it too much. Let it rest, uncovered, for 20-30 minutes. This short rest allows the gluten to relax, making the final shaping much easier.
Step 5: Final Shaping and Cold Proof
Lightly flour your hands and gently shape the dough into its final form, whether a round boule or an oblong bâtard. Focus on building surface tension and creating a smooth, tight skin. Transfer the shaped dough, seam-side up, into a floured banneton or a bowl lined with a floured cloth. Cover the banneton with plastic wrap or a shower cap and refrigerate for 12-18 hours. This cold proofing slows fermentation, deepens flavor, and makes the dough easier to score.
Step 6: Bake Your Honey Oat Sourdough Bread
Preheat your oven to 475°F (245°C) with a Dutch oven inside for at least 30 minutes. Carefully remove the hot Dutch oven. Gently invert the dough from the banneton into the Dutch oven. Score the top of the dough with a sharp lame or razor blade. Cover and bake for 30 minutes. After 30 minutes, remove the lid and reduce the oven temperature to 450°F (230°C). Continue baking uncovered for another 20-25 minutes, or until the crust is deeply golden brown and the internal temperature reaches 200-210°F (93-99°C). Transfer to a wire rack and let cool completely for at least 2 hours before slicing for the best texture and flavor development.
Tips for a Stellar Honey Oat Sourdough Loaf
Achieving that perfect loaf of Honey Oat Sourdough Bread can feel like a magical feat, but with a few insider tips, you will consistently bake wonders. The journey of sourdough baking is as much about understanding your ingredients as it is about following instructions. Don’t be afraid to experiment a little, as every kitchen environment presents its unique challenges and opportunities.
Understanding Your Starter’s Mood
Your sourdough starter is a living, breathing entity, and its activity levels can fluctuate based on temperature, feeding schedule, and even the flour you use. For the best results, always use an active, bubbly starter that has recently peaked after feeding. It should float when a small piece is dropped into water. A strong starter provides the necessary lift and robust flavor that makes Honey Oat Sourdough Bread truly exceptional. If your starter seems sluggish, give it a few extra feedings at warmer temperatures to get it back into prime condition.
Hydration is Key for Tender Texture
Sourdough bread often calls for higher hydration levels, which contributes to its open, airy crumb. While handling a very sticky dough can be intimidating, resist the urge to add excessive flour during the mixing or shaping stages. A well-hydrated dough will ultimately yield a moister, more tender loaf. Keep your hands slightly damp or floured when working with the dough to prevent sticking, and rely on the stretch and fold technique to build strength without over-handling. The inclusion of oats also absorbs some moisture, so maintaining proper hydration is especially important for our Honey Oat Sourdough Bread.
Don’t Fear the Fermentation Process
Fermentation is where the magic happens, developing the complex flavors and signature tang of sourdough. Pay close attention to your dough, rather than strictly adhering to times in the recipe. Look for visual cues: the dough should increase significantly in volume (usually 30-50% during bulk fermentation), feel airy, and show small bubbles on the surface. An under-fermented dough will be dense, while an over-fermented one might be difficult to shape and lead to a very sour flavor. Trust your senses – the look, feel, and even smell of the dough will guide you.
Serving Suggestions and Storage
Once your magnificent Honey Oat Sourdough Bread has cooled, the possibilities are endless! It is truly a versatile loaf, ready to elevate any meal or snack. For breakfast, a slice toasted with a dollop of cream cheese and a drizzle of extra honey is pure bliss. It also makes an incredible foundation for a hearty turkey and cranberry sandwich or a classic grilled beef and cheese. Don’t forget to try it alongside a warm bowl of lentil soup or a fresh garden salad, where its robust texture and subtle sweetness can truly shine. To keep your Honey Oat Sourdough Bread fresh, store it at room temperature in a bread box or a paper bag for up to 2-3 days. For longer storage, slice the cooled loaf and freeze the slices in an airtight freezer bag. You can then toast individual slices straight from the freezer whenever a craving strikes, ensuring that delightful aroma fills your kitchen again and again.
FAQs about Honey Oat Sourdough Bread
Can I use instant yeast instead of a sourdough starter?
While you could technically make an oat and honey bread with instant yeast, it would not be a sourdough bread. The unique flavor, texture, and rise characteristics of this recipe come directly from the active sourdough starter, which contains wild yeasts and beneficial bacteria.
How long does Honey Oat Sourdough Bread last?
Stored properly at room temperature, your homemade Honey Oat Sourdough Bread typically stays fresh and delicious for 2 to 3 days. Its excellent keeping qualities are one of the many benefits of sourdough. Beyond that, it’s perfect for toast or croutons.
What if my dough is too sticky during shaping?
A sticky dough is common, especially with higher hydration sourdoughs. Lightly flour your work surface and your hands, but use flour sparingly. Focus on developing surface tension by gently pulling and tucking the dough, rather than adding more flour into the dough itself. A bench scraper can be a great tool for handling sticky dough.
The Joy of Baking Your Own Honey Oat Sourdough Bread
There’s an undeniable satisfaction that comes from pulling a perfectly golden loaf of Honey Oat Sourdough Bread from your oven. It’s more than just a recipe; it’s an experience, a journey of patience, a little science, and a lot of love. Each step, from the initial mix to the glorious final bake, contributes to a creation that’s not only delicious but also deeply rewarding. Sharing this bread with friends and family is a special moment, a testament to your efforts and the simple pleasure of homemade goodness. So roll up your sleeves, embrace the process, and prepare to be amazed by the incredible bread you can create right in your own kitchen.
Perfecting the Cooking Process
Achieving the perfect Honey Oat Sourdough Bread requires methodical steps. Start by hydrating your flour, then gently incorporate the active starter, water, honey, and salt. Develop the dough through consistent stretch and folds during bulk fermentation, followed by careful shaping and cold proofing. Finally, bake your golden oat bread in a preheated Dutch oven for an irresistible crust and soft, airy interior.
Add Your Touch
Personalize your Honey Oat Sourdough Bread by experimenting with delicious additions! For extra texture and nutrition, consider mixing in a handful of sunflower or pumpkin seeds. A touch of ground cardamom or nutmeg can introduce a warm, aromatic twist. You could even swap a small portion of the all-purpose flour for rye or whole wheat flour to deepen its complex flavor profile.
Storing & Reheating
Keep your Honey Oat Sourdough Bread fresh by storing it at room temperature in an airtight container or a clean bread bag. Avoid refrigeration, as it tends to dry out the crumb quickly. For reheating, a quick refresh in a moderate oven (around 350°F or 175°C) for 5-10 minutes, or a slice in the toaster, will beautifully revive its delicious crust and tender interior.
My friend once called me a “bread wizard” after tasting this Honey Oat Sourdough Bread, declaring it the best thing since sliced… well, actual sliced bread! It instantly became a requested staple at every family gathering, much to my delight.
- Ensure your sourdough starter is active and bubbly, doubling within 4-6 hours, before mixing your dough. A weak starter leads to dense bread, not the airy texture we adore.
- Handle the dough gently during shaping. Overworking can tear the delicate gluten structure you’ve meticulously developed, resulting in a less open crumb in your Honey Oat Sourdough Bread.
- Always preheat your Dutch oven thoroughly. The initial burst of steam and high heat creates that gorgeous, crispy crust and allows for maximum oven spring for your wholesome sourdough with honey.
Ah, the intoxicating aroma of freshly baked bread. Is there anything quite like it? For centuries, bakers have chased that elusive perfection, that golden crust, that soft, airy interior. But let’s be honest, for many of us, the journey into sourdough baking felt less like a graceful dance and more like a chaotic wrestling match with an unpredictable, sticky blob. My first few attempts at sourdough were, shall we say, “character-building.” They resembled dense bricks more than bread, fit for construction rather than consumption. My family, bless their patient souls, would politely nibble at the corners, muttering about its “rustic charm.”
Then came the revelation: Honey Oat Sourdough Bread. The addition of honey not only sweetens the deal (literally) but also lends a beautiful golden hue and tenderness. The oats? They add a delightful texture and a wholesome, comforting earthiness that balances the tang of the sourdough perfectly. This isn’t just bread; it’s a hug in carb form, a testament to patience, and a triumph over past baking blunders. Forget those rock-hard doorstops; this sweet oat sourdough recipe will have you feeling like a true artisan, without the years of flour-dusted therapy.
The Sourdough Starter: Your Bubbly Best Friend
Before we dive into the glorious world of baking, let’s talk about your starter. Think of it as your quirky, living pet. It needs feeding, attention, and a good environment to thrive. A happy, active starter is the secret handshake of great sourdough bakers. When your starter is consistently doubling (or even tripling!) in size after a feeding, smelling pleasantly yeasty with a hint of tang, and covered in tiny bubbles, it’s ready for action. Neglect your starter, and it will exact its revenge in the form of flat, uninspired loaves. Feed it well, and it will reward you with glorious Honey Oat Sourdough Bread.
Feeding Your Starter for Success
To ensure your starter is at its peak, feed it 4-12 hours before you plan to mix your dough. Take a small amount of your mature starter (e.g., 50 grams), discard the rest (or use it for crackers!), then feed it with equal parts water and flour (e.g., 50g water, 50g bread flour). Mix well, cover loosely, and let it do its bubbly magic at room temperature. A robust starter ensures your honey-kissed bread gets the lift it deserves.
Gather Your Baking Arsenal
Creating this magnificent sourdough loaf with oats doesn’t require a commercial bakery, but a few key tools and ingredients make all the difference. Think of these as your trusty companions on this delicious quest.
Essential Ingredients for Honey Oat Sourdough Bread
- Active Sourdough Starter:100 grams (fed and active, see above for tips!)
- Warm Water:350 grams (around 90-95°F / 32-35°C)
- Honey:60 grams (local raw honey adds amazing flavor!)
- Bread Flour:450 grams (high protein content is key for gluten development)
- Whole Wheat Flour:50 grams (adds depth and nutrition)
- Rolled Oats:50 grams, plus extra for topping (not instant oats!)
- Fine Sea Salt:10 grams
Tools of the Trade
- Large Mixing Bowl
- Dough Scraper
- Kitchen Scale (crucial for accurate measurements!)
- Banneton or proofing basket (or a bowl lined with a floured kitchen towel)
- Dutch Oven with Lid (cast iron or ceramic, 5-7 quart capacity)
- Sharp Blade or Lame for scoring
- Parchment Paper
Crafting Your Masterpiece: The Honey Oat Sourdough Process
This is where the magic truly happens. Follow these steps, and soon you’ll be pulling a beautiful Honey Oat Sourdough Bread from your oven, ready to impress.
Mixing the Magic Dough (Autolyse and First Mix)
In your large mixing bowl, combine the warm water and honey, stirring until the honey dissolves. Add the active sourdough starter and gently mix it into the water until mostly dispersed. Next, add both flours and the 50 grams of rolled oats. Mix with a dough scraper or your hands until no dry spots remain and a shaggy dough forms. Cover the bowl and let it rest for 30 minutes. This “autolyse” phase allows the flour to fully hydrate and gluten development to begin.
Incorporating the Salt & Initial Folds
After the autolyse, sprinkle the salt evenly over the dough. Dampen your hands slightly and gently work the salt into the dough using a “pinching and folding” motion for about 2-3 minutes. The dough will feel sticky at first, but keep going. Once the salt is integrated, perform your first set of stretch and folds. Grab a portion of the dough from one side, stretch it upwards, and fold it over the center. Rotate the bowl and repeat this 3-4 times until all sides have been stretched and folded. Cover and rest for 30 minutes.
Bulk Fermentation: The Dough’s Spa Day
Over the next 3-4 hours, you will perform 3-4 more sets of stretch and folds, resting for 30-45 minutes between each set. With each set, you will notice the dough becoming smoother, stronger, and more elastic. This is bulk fermentation, where the yeast and bacteria in your starter work their magic, developing flavor and structure in your golden oat bread. Keep the dough covered between folds to prevent it from drying out.
Pre-Shaping with Finesse
Once bulk fermentation is complete (the dough should be jiggly, slightly increased in volume, and pass the “jiggle test”), gently tip the dough out onto a lightly floured surface. Using a dough scraper, gently shape it into a round or oval. This isn’t the final shape; it’s about building tension. Let it rest for 20-30 minutes, uncovered, allowing the gluten to relax.
The Final Shaping and Overnight Slumber
Lightly flour your banneton or lined bowl. Take your pre-shaped dough and gently flip it over. Perform your final shaping technique, aiming to create a taut surface and tight seam at the bottom. The goal is to build maximum surface tension. Once shaped, transfer the dough seam-side up into your prepared banneton. Cover the banneton with a plastic bag or shower cap and refrigerate for 12-18 hours. This cold proofing develops even more flavor and makes the dough easier to handle.
Baking for Golden Perfection
The next morning, preheat your oven to 475°F (245°C) with your Dutch oven inside for at least 45-60 minutes. This ensures the Dutch oven is scorching hot. Carefully remove the hot Dutch oven from the oven. Gently invert your cold Honey Oat Sourdough Bread dough onto a piece of parchment paper. If desired, lightly mist the surface with water and sprinkle with extra rolled oats. Score the top with a sharp lame or blade in your desired pattern (a single deep slash often works best). Carefully lower the dough and parchment into the hot Dutch oven, cover with the lid, and bake for 20 minutes.
After 20 minutes, remove the lid from the Dutch oven. Reduce the oven temperature to 450°F (230°C) and continue baking for another 25-30 minutes, or until the crust is a deep golden brown and the internal temperature reaches 200-210°F (93-99°C). Once baked, carefully remove the bread from the Dutch oven and transfer it to a wire rack to cool completely for at least 2-3 hours before slicing. Patience is paramount here, as slicing too early can result in a gummy crumb.
Troubleshooting Your Sourdough Journey
Every baker encounters bumps on the road. Don’t let common sourdough challenges discourage you. This section addresses frequent questions that arise when baking Honey Oat Sourdough Bread.
What if my dough is too sticky to handle?
A sticky dough can be frustrating! First, ensure you’re using bread flour, which has a higher protein content. You can also lightly dampen your hands with water instead of flour during handling. If it’s still overly sticky, try reducing the water by a small amount (10-20 grams) in your next bake. Hydration varies with flour type and humidity.
Can I reduce the fermentation time?
While you can shorten the bulk fermentation by placing your dough in a warmer spot, the cold proofing is crucial for flavor development and ease of handling. Skipping or significantly shortening the cold proof will impact the taste and potentially make shaping much harder. Patience truly unlocks the best flavor in a sourdough loaf with oats.
My crust isn’t crispy enough, help!
For an extra crispy crust on your honey-kissed bread, ensure your Dutch oven is thoroughly preheated. The enclosed environment creates steam, essential for crust development. After removing the lid, a final 5-10 minutes of baking directly on the oven rack (without the Dutch oven) can also help achieve maximum crispness. Ensure the bread cools completely on a wire rack to prevent steaming and softening the crust.
The Grand Finale: Enjoying Your Honey Oat Sourdough Bread
After all that meticulous care, that gentle handling, and that agonizing wait for it to cool, it’s finally time for the grand reward. Slice into your Honey Oat Sourdough Bread and prepare for a symphony of textures and flavors. The crunchy crust crackles, giving way to a soft, open crumb studded with delicate oats. The subtle sweetness of honey dances with the characteristic tang of sourdough, creating a loaf that’s both comforting and sophisticated.
This golden oat bread is spectacular on its own, perhaps with just a smear of butter. It transforms into an epic avocado toast, a heavenly base for your favorite sandwich fillings (think roasted turkey or a robust beef pastrami), or an unforgettable companion to a hearty stew. However you choose to enjoy it, this Honey Oat Sourdough Bread isn’t just a recipe; it’s an experience, a journey, and a testament to the simple joys of baking. So, go forth, bake with confidence, and savor every delicious slice!
Conclusion for Honey Oat Sourdough Bread
Baking your own Honey Oat Sourdough Bread is a wonderful journey. It’s more than just a delicious loaf. It’s an experience filled with warmth and incredible aroma. You get the undeniable satisfaction of creation. This recipe delivers a perfectly balanced crumb. You’ll taste a delightful hint of sweetness from the honey. The wholesome texture of oats adds to its appeal. All this comes in a satisfyingly crisp crust. We hope you found joy in every step. From feeding your starter to that glorious first slice. Go forth, bakers! Share the golden goodness of your homemade Honey Oat Sourdough Bread!
Print
Honey Oat Sourdough Bread
- Total Time: 35 minutes
- Yield: 4 servings
Description
Discover Honey Oat Sourdough: a wholesome loaf blending tangy starter, sweet honey, and hearty oats. Expert instructions guide mixing, autolyse, and bulk fermentation for a perfect crumb.
Ingredients
- Active sourdough starter: 100g
- Strong bread flour: 400g
- Whole wheat flour: 100g
- Warm water: 350g (approx. 90-95°F / 32-35°C)
- Fine sea salt: 10g
- Local honey: 30g (about 2 tablespoons)
- Rolled oats: 60g (plus 10g for topping)
Instructions
- Step 1: **Mixing and Autolyse**
- Step 2: **Bulk Fermentation and Oat Incorporation**
- Step 3: **Shaping and Cold Proofing**
- Step 4: **Baking**
- Step 5: **Finishing the Bake and Cooling**
Notes
- Keep your cooled loaf in a bread box or a paper bag at room temperature for up to 3-4 days to preserve its delightful crust and tender crumb, or slice and freeze for longer freshness.
- To revive a day-old slice, lightly mist it with water and pop it into a 350°F (175°C) oven for about 5-7 minutes until the crust is crisp and the interior is warm and soft again.
- This wholesome loaf, with its subtle sweetness from honey and nutty oats, is absolutely divine toasted and slathered with salted butter, or paired with a sharp cheddar and a drizzle of extra honey for a delightful snack.
- Because the rolled oats will absorb a significant amount of moisture, keep an eye on your dough's consistency during mixing; a tiny splash more water might be needed to achieve the perfect supple, extensible dough for a wonderfully open crumb.
- Prep Time: 15 minutes
- Cook Time: 20 minutes
- Method: Stovetop
- Cuisine: American
Nutrition
- Serving Size: 1 slice (approx. 45g)
- Calories: 135
- Sodium: 220mg
- Fat: 1.5g
- Saturated Fat: 0.2g
- Trans Fat: 0g
- Protein: 3g
FAQs
Why are oats a fantastic addition to Honey Oat Sourdough Bread?
Oats bring wonderful texture and a subtle, nutty flavor to your sourdough. They absorb moisture beautifully. This leads to a remarkably soft and tender crumb. This often contrasts with traditional chewy sourdough. Beyond texture, oats add fiber and essential minerals. They boost the bread’s overall nutritional value. Combined with honey’s gentle sweetness, they create a comforting, wholesome loaf. It’s perfect for breakfast toast or hearty sandwiches. Oats truly change the game for a softer, more complex sourdough experience.
How does honey impact the fermentation and flavor of sourdough?
Honey isn’t just for sweetness in your Honey Oat Sourdough Bread. It plays a vital role in fermentation and flavor development. Natural sugars in honey feed your sourdough starter. This often leads to a more vigorous rise. You’ll see a wonderfully open crumb. Beyond the lift, honey introduces a nuanced sweetness. This balances sourdough’s characteristic tang. It creates a more rounded, mellow flavor profile. Honey also gives a beautiful, golden-brown crust. It helps retain moisture. Your loaf stays fresh and delicious longer.
Can I use different types of flour for this Honey Oat Sourdough Bread recipe?
Absolutely! Our recipe typically uses a blend of bread and whole wheat flour. Feel free to experiment with other flours. You can boost the whole wheat content for a denser loaf. Or, add a touch of rye for extra complexity. Just remember, different flours absorb water differently. You might need to adjust the hydration. The joy of baking sourdough, especially our Honey Oat Sourdough Bread, is customization. Make it suit your taste and what you have available.
What is the best method for storing freshly baked Honey Oat Sourdough Bread?
To keep your magnificent Honey Oat Sourdough Bread at its prime, proper storage is key. Once completely cooled, store the loaf at room temperature. For short-term storage (1-2 days), simply place it cut-side down on a clean cutting board. You can also wrap it in a clean linen towel. For longer preservation, slice the cooled bread. Freeze the slices in an airtight bag. This lets you toast individual slices as needed. Enjoy that fresh-baked taste anytime without waste. Avoid refrigeration; it dries out sourdough quickly.


Leave a Comment