

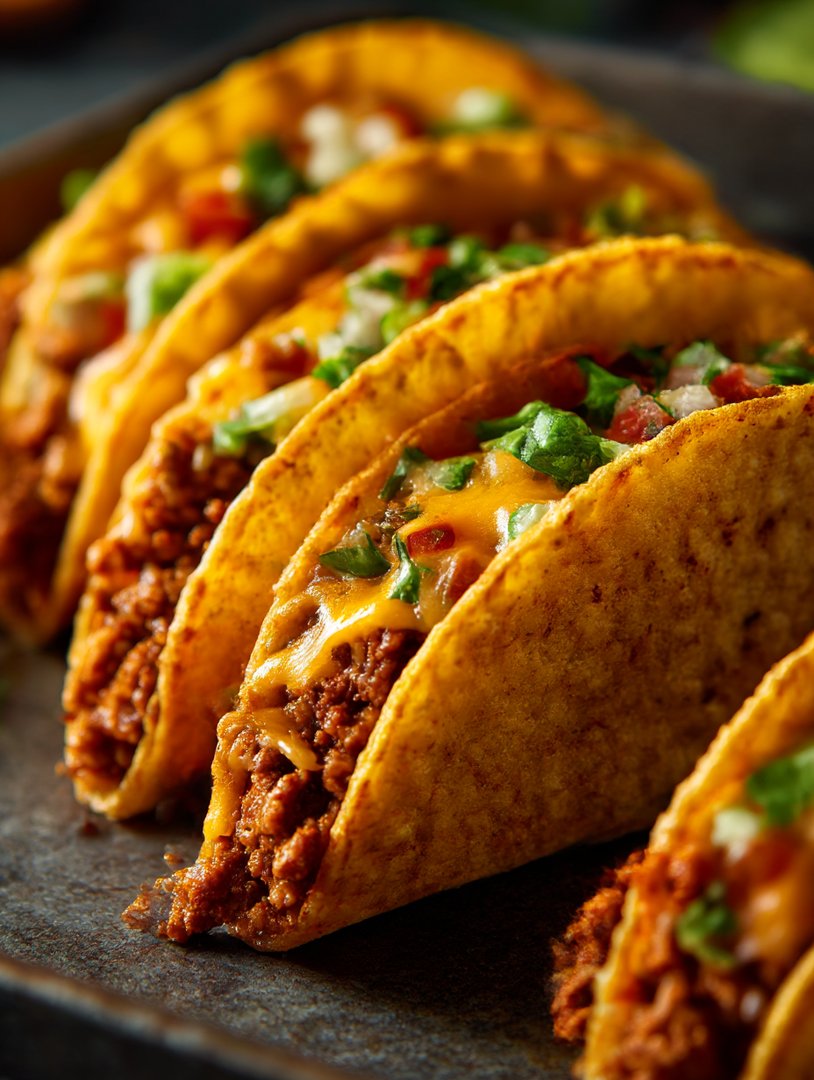
Forget those flimsy, disappointing taco nights of the past. Imagine biting into a shell that boasts a perfect crunch, cradling spiced ground beef and copious amounts of melted cheese—that is the magic ofCheesy Oven-Baked Tacos.
These aren’t just dinner; they are culinary victory, requiring minimal effort but delivering maximum flavor impact straight from your oven.
- These tacos offer unmatched ease of preparation, transforming hectic weeknights into effortless culinary successes with minimal cleanup required.
- The rich, savory beef filling is perfectly balanced with sharp cheddar and a smoky spice blend, creating a deeply satisfying flavor profile.
- Visually appealing and ready for stacking, the baked shells maintain their structure, making them ideal for messy but delicious family gatherings.
- This versatile recipe adapts beautifully to shredded chicken or seasoned beans, ensuring everyone at the table finds something they truly love.
Ingredients for Cheesy Oven-Baked Tacos
Here’s what you’ll need to make this delicious dish:
- Ground Beef or TurkeyChoose lean ground beef (85/15) or ground turkey for the filling, ensuring it’s properly browned and drained of excess fat.
- Taco SeasoningA good quality blend is essential, providing deep flavor notes of chili, cumin, and oregano.
- Beef BrothA splash of broth keeps the filling moist and rich, preventing it from drying out while baking in the oven.
- Hard Taco ShellsUse the stand-and-stuff style if possible, as they make the filling process much easier and more stable for baking.
- Shredded Cheese BlendA mix of Monterey Jack and cheddar cheese melts beautifully and provides that crucial, gooey texture.
- Onion and GarlicFinely diced aromatics are the foundation of any good savory dish, adding depth to the beef filling.
- Optional ToppingsInclude sour cream, chopped cilantro, diced tomatoes, or a dollop of fresh guacamole to finish the dish.
The full ingredients list, including measurements, is provided in the recipe card directly below.
The Secret to Tacos That Don’t Explode
We’ve all been there: you successfully load a crispy taco shell, and the moment you attempt to lift it to your mouth, the structural integrity vanishes. It’s a tragic culinary event, resulting in a pile of spilled filling and shredded dignity. The beauty ofCheesy Oven-Baked Tacoslies in their engineering. By baking them loaded and pressed together, the cheese melts and acts as a delicious, edible mortar, sealing the filling inside and strengthening the shell against the stresses of transportation (from plate to mouth).
This technique turns taco night from a race against disintegration into a relaxed, enjoyable meal. You are effectively creating taco architecture that is certified for high-velocity consumption. Plus, handling fewer messy individual shells means less grease splatter and far fewer paper towels required, which is always a win in my book.
Perfecting the Beef Filling
The key to a truly unforgettable baked taco is not just the crunch, but the filling inside. We start by sautéing the diced onions until they are translucent and sweet, then adding the minced garlic until fragrant—about 30 seconds—before introducing the ground meat. Drain the fat thoroughly, as excess grease will lead to soggy shells, undermining our entire crispy mission.
Once drained, return the meat to the pan and introduce your taco seasoning. Don’t skimp on this step; let the meat absorb those smoky, earthy spices. Instead of just adding water, we incorporate a small amount of beef broth. This trick moistens the filling, prevents the spices from tasting chalky, and deepens the overall umami flavor. Simmer the mixture just until the broth has mostly evaporated, leaving you with a robust, flavorful, and slightly sticky filling that adheres perfectly when baked.
How to Make Cheesy Oven-Baked Tacos
Follow these simple steps to prepare this delicious dish:
Step 1: Prepare the Filling and Preheat
Preheat your oven to 375°F (190°C). Prepare the beef filling as described above, ensuring the meat is seasoned, moist, and thoroughly cooked. Lightly spray a 9×13 inch baking dish with nonstick spray to prevent any cheese overflow from sticking to the pan.
Step 2: Assemble the Tacos
Lay the hard taco shells side-by-side in the prepared baking dish, fitting them snugly to help them stand upright. Fill each taco shell approximately halfway with the seasoned beef mixture. Be careful not to overstuff them at this stage, as we still need to add the star of the show.
Step 3: Introduce the Cheese Avalanche
Sprinkle a generous amount of shredded cheese blend over the top of the filling in each taco. Ensure the cheese rests right up against the edges of the shell. The tighter the fit of the tacos in the pan, the better they will stand, and the neater the cheese melt will be.
Step 4: The Golden Bake
Place the baking dish into the preheated oven and bake for 8 to 12 minutes. The goal is two-fold: the cheese must be completely melted, gooey, and beginning to bubble slightly, and the taco shells should be heated through and slightly crispier. Watch closely to prevent the edges of the shells from burning.
Step 5: Load the Toppings and Serve
Carefully remove the baking dish from the oven. Using tongs, transfer the baked tacos to a serving platter. This is the moment to personalize each taco with your favorite toppings, such as shredded lettuce, sour cream, and fresh salsa.
Customizing Your Cheesy Oven-Baked Tacos Experience
One of the best things about tacos is their inherent flexibility. Once you have mastered the foundational technique of baking them into cheesy, crunchy perfection, you can start treating the recipe like a culinary playground. Maybe Tuesday needs a bit more heat, or perhaps your best friend prefers poultry over beef; these oven-baked tacos can handle any adjustment you throw at them.
Spice Level Adjustments
If your standard taco seasoning feels a little lackluster, it’s easy to crank up the volume. For a moderate increase in heat, stir in a teaspoon of chipotle powder or smoked paprika alongside your standard seasoning blend—this adds depth without overwhelming the palate. If you’re truly seeking fire, finely dice a jalapeño or serrano pepper and sauté it with the onions and garlic at the beginning. Alternatively, a few dashes of hot sauce mixed directly into the beef filling before baking will distribute the heat evenly and consistently throughout the meal. Just remember to warn your guests, or at least have a large glass of milk ready for anyone who underestimated your kitchen prowess.
Vegetarian and Chicken Alternatives
While the classic ground beef version is spectacular, these oven-baked tacos are equally wonderful when adapted for different dietary preferences. For a fantastic vegetarian option, swap the beef for a mixture of black beans, corn, and sautéed peppers. Mash about half of the black beans to create a thicker, stickier mixture that holds up just as well as ground meat inside the shell. Season the bean mixture with the same spices, maybe adding a squeeze of lime juice for brightness.
If you prefer chicken, shred cooked chicken breast or thigh meat and toss it with the taco seasoning and a small amount of broth until coated. The shredding process allows the chicken to tuck neatly into the hard shells and prevents it from spilling out. Chicken tends to dry out faster than beef, so make sure to use enough broth or perhaps a mild green chili sauce to keep it moist during the brief baking period. Whether beef, beans, or poultry, the melted cheese acts as the ultimate unifier.
Why Baking Beats Frying
The decision to bake the tacos rather than fry them individually is not just about convenience; it is a declaration of culinary sanity. Traditional deep-frying requires precision, constant attention, and often leaves your kitchen smelling faintly of hot oil for three days straight. Furthermore, constructing and frying individual tacos one by one transforms dinner preparation into a high-stress assembly line.
Baking, conversely, is hands-off magic. Once the tacos are loaded into the baking dish, your work is essentially done. The oven provides even, radiant heat, simultaneously crisping the shell while melting the cheese into that glorious, unifying layer. This method dramatically reduces the fat content compared to frying, giving you a slightly healthier—or at least, less greasy—final product without sacrificing any of the texture or flavor. You get the crunch you crave and the gooey, cheesy filling you deserve, all while keeping cleanup simple. This recipe proves that sometimes, the easiest route is also the smartest route, delivering delicious, structurally sound tacos every single time. It’s a testament to the fact that when cheese is involved, the oven is your best friend.
So, there you have it: the blueprint for a superior taco experience. TheseCheesy Oven-Baked Tacoswill revolutionize your dinner rotation, transforming stressful meal prep into an exercise in simple, cheesy perfection. Get ready to enjoy the crunch, the savoriness, and the sheer joy of a taco that doesn’t collapse under pressure. Happy baking!
The Accidental Discovery of Sunshine on a Plate
My culinary breakthrough often happens after a long, exhausting day when the pantry is bare, and motivation is nonexistent. These Cheesy Oven-Baked Tacos were born from pure desperation and a stubborn refusal to order takeout, proving that true genius thrives under pressure.
Let’s be honest, traditional tacos are chaos. You stand over the stove, trying to fry shells while simultaneously seasoning meat and shredding lettuce, inevitably dropping half the filling onto the counter because gravity is apparently prejudiced against deliciousness. For years, I avoided taco night, deeming it too messy, too high-maintenance, and requiring far too many cleanup hours. I needed a hero meal—a dish that delivered maximum crunch and flavor without requiring an architectural degree to construct or a hazmat suit to clean up afterward. This is where the brilliant simplicity of the oven changed everything.
The Quest for Crispy Perfection
The turning point arrived one Tuesday evening. I had a pound of ground beef, a stack of tortillas nearing their expiration date, and a colossal block of cheddar demanding attention. I remember staring forlornly at the frying pan, dreading the splatter of oil, when a lightbulb flickered—or maybe it was just the overhead kitchen fluorescent. Why am I frying these things individually like a short-order cook gone rogue, when I could load them up and bake them all at once?
The first attempt was sloppy, resembling cheesy boat wrecks, but the flavor was undeniable. The cheese acted as the structural cement, melding the meat and the shell into one cohesive, crispy unit. After a few tweaks to the assembly process and the seasoning blend, I had it: the perfect, mess-free, crunchy meal. It was like taking all the best parts of a crispy taco and a cheesy casserole and combining them into a handheld triumph. This recipe, these glorious Cheesy Oven-Baked Tacos, instantly became a staple, beloved by all who experienced their effortless delight.
Why Baking Changes Everything
Baking these tacos provides two distinct advantages over pan-frying or deep-frying. First, it ensures that every single taco is evenly heated and structurally sound. The heat surrounds the entire shell, encouraging a uniform crispness without the risk of floppy bottoms or burned edges. Second, it allows the cheese to melt slowly and deeply into the seasoned meat filling, creating that internal binding layer that keeps the contents exactly where they belong—inside the taco. Plus, baking a tray of twelve tacos takes exponentially less effort than wrangling them one or two at a time on the stovetop.
Gathering Your Supplies for the Ultimate Melt
The beauty of this recipe lies in its straightforward nature and common pantry components. We aren’t using fancy ingredients here; we are focusing on robust flavor and that beautiful, golden-brown melt. If you are looking for comfort food disguised as a fun weeknight meal, you have arrived.
Essential Ingredients List
To create these stunning, baked cheesy tacos, you need reliable staples that pack a punch. We prioritize quality cheese and highly seasoned meat, ensuring the final product sings with flavor.
For the Seasoned Filling
- 1.5 lbs ground beef (or ground turkey for a leaner option)
- 1 large yellow onion, finely diced
- 1 packet (1 oz) taco seasoning blend (or homemade equivalent)
- 1/2 cup beef or chicken broth
- 1 tablespoon tomato paste
- 1 teaspoon chili powder
- 1/2 teaspoon cumin
- Salt and black pepper to taste
For Assembly
- 12 to 18 hard taco shells (depending on filling preference)
- 3 cups shredded cheddar cheese, sharp or medium
- 1 cup Monterey Jack cheese, shredded (for extra melt)
- Toppings: Shredded lettuce, diced tomatoes, sour cream (or plain yogurt alternative), salsa
A note on the cheese: do yourself a favor and shred the cheese fresh from the block. As mentioned earlier, the pre-shredded stuff often includes anti-caking agents that interfere with that glorious, gooey melt we are aiming for. When making Cheesy Oven-Baked Tacos, the cheese is not just an ingredient; it is a structural engineer and a flavor powerhouse.
Perfecting the Cooking Process
To ensure maximum crispiness and optimal melting, first cook the seasoned ground beef or turkey until beautifully browned. While the meat rests briefly, preheat the oven and lightly warm the tortillas. This sequential preparation guarantees every Cheesy Oven-Baked Taco reaches peak structural integrity.
The Seasoning Secret
Start by preheating your oven to 375°F (190°C). In a large skillet over medium-high heat, brown the ground meat until no pink remains. Drain any excess fat thoroughly—this is vital for preventing soggy shells later. Add the diced onion and cook until softened, about five minutes. Stir in the taco seasoning, chili powder, and cumin, cooking for one minute until fragrant. Next, incorporate the tomato paste and the beef or chicken broth. Bring the mixture to a simmer and let it cook uncovered for about 5 to 7 minutes, allowing the liquid to reduce and the flavors to concentrate. You want a thick, intensely seasoned filling, not a soup.
Step-by-Step Assembly Guide
Assembly is surprisingly quick and efficient when you use the proper baking vessel. Many grocery stores sell specialized taco racks, but frankly, arranging the shells open-side-up in a standard 9×13 baking dish works perfectly, leaning them against the sides to hold them upright.
- Arrange the taco shells snugly in the baking dish. If using 12 shells, they should fit well into a standard rectangular pan.
- Fill each shell evenly with the seasoned meat mixture, usually about 3 to 4 tablespoons per shell. Don’t overstuff them yet!
- Sprinkle a generous layer of the mixed cheddar and Monterey Jack cheese over the meat filling in each shell. Push the cheese down slightly so it nests around the meat.
- Bake for 10 to 12 minutes. You are waiting for the cheese to fully melt and bubble and the shell edges to crisp up nicely.
- Carefully remove the pan from the oven. Let them rest for just a moment before moving them to a serving platter.
The beauty of the baked taco is that it is served warm and ready to receive your favorite cold toppings immediately. Unlike pan-fried tacos that often cool instantly, these retain their warmth, allowing the cheese to stay gooey until the last bite. Serve with shredded lettuce, fresh tomato, a dollop of sour cream or yogurt, and your favorite spicy salsa for that fresh contrast.
Add Your Touch
Swap out ground beef for seasoned shredded chicken or hearty lentils if you like. Instead of cheddar, try Monterey Jack for extra stretch. A dash of apple cider vinegar in the meat mixture can brighten the flavor profile, adding a delightful, subtle tanginess.
Customizing this recipe is highly encouraged. If you prefer things spicy, stir in a finely diced jalapeño pepper with the onions, or add a teaspoon of cayenne pepper to the meat seasoning. For a veggie boost, drained black beans or corn can be mixed directly into the meat filling, bulking up the tacos and adding textural complexity. If you are avoiding hard shells, the same baking technique works beautifully with soft flour tortillas, folded gently in half and baked until the edges are golden brown and slightly firm.
Storing & Reheating
Store cooled leftover Cheesy Oven-Baked Tacos, pre-assembled, in an airtight container for up to three days. For reheating, the oven is your best friend; bake them at 350°F (175°C) for 10 minutes until the shells regain their crispness and the cheese is bubbly again.
Microwaving is generally discouraged for these ultimate cheesy shells, as it tends to turn the crispy shell tragically soft. The key to preserving their greatness is returning them to dry heat. If you only have one or two leftovers, a toaster oven works wonders, replicating the initial oven crispness quickly and effectively.
- To prevent sogginess, always drain the seasoned ground meat thoroughly after cooking, ensuring the filling is moist but not greasy before assembly.
- Brush the edges of the taco shells lightly with vegetable oil or cooking spray before baking to achieve that professional, satisfying golden crunch.
- Use a medium-sharp cheddar and shred it yourself; pre-shredded cheese often contains anti-caking agents that hinder the ultimate melt factor we desire.
I once served these Cheesy Oven-Baked Tacos at a backyard gathering, and my notoriously picky cousin asked for the recipe immediately, claiming they cured his decade-long distrust of weeknight meals.
Conclusion for Cheesy Oven-Baked Tacos
These Cheesy Oven-Baked Tacos prove that the simplest meals are often the most satisfying, delivering maximum flavor with minimal fuss. They are the ultimate weeknight hero, customizable to fit any preference, whether you choose ground beef, shredded chicken, or a plant-based filling. Forget the flimsy shells and messy frying; baking guarantees a spectacular crunch and perfectly melted cheese every single time. Get ready to ditch the takeout menu because this easy, cheesy masterpiece is about to become your family’s most requested dinner.
Print
Cheesy Oven-Baked Tacos
- Total Time: 35 minutes
- Yield: 4 servings 1x
Description
Skip the mess! Our Cheesy Oven-Baked Tacos feature seasoned ground beef packed into sturdy shells, smothered in cheese, and baked until golden.
Ingredients
- 1 pound ground beef (80/20 fat ratio recommended)
- 1 packet (1 oz) taco seasoning mix
- 1/2 cup water
- 12 stand-n-stuff or flat-bottomed corn/flour taco shells
- 2 cups shredded Monterey Jack and cheddar cheese blend
- 1/2 large yellow onion, diced
- 1/2 cup salsa (for topping)
Instructions
- Step 1: Preheat the oven to 375°F (190°C). Brown the ground beef and diced onion in a large skillet over medium-high heat. Drain off any excess grease, then stir in the taco seasoning and water. Bring the mixture to a simmer and cook for 3-5 minutes until the liquid has reduced and the meat mixture is thick.
- Step 2: Lightly grease a 9×13 inch baking dish. Arrange the 12 taco shells upright, nesting them closely together in tight rows to keep them stabilized.
- Step 3: Spoon approximately 2 to 3 tablespoons of the seasoned beef mixture into the bottom of each taco shell.
- Step 4: Generously sprinkle the shredded cheese blend over the meat inside each taco shell, ensuring a good amount is packed down inside the shell for maximum melt.
- Step 5: Bake the tacos for 10-12 minutes, or until the cheese is completely melted and bubbly, and the edges of the taco shells are lightly crisped. Carefully remove the tacos from the pan and serve immediately with salsa and any desired fresh toppings.
Notes
- To maximize crispness and avoid soggy bottoms, drain the ground beef thoroughly before seasoning; even 80/20 beef yields a surprising amount of grease.
- Complement the rich, cheesy filling with cool, crunchy toppings like shredded iceberg lettuce, chopped cilantro, or a drizzle of lime-spiked sour cream.
- For quick reheating, use an air fryer or toaster oven set to 350°F for 3-5 minutes to melt the cheese and re-crisp the shell without drying out the meat.
- Store any leftovers tightly wrapped in foil and refrigerate promptly, but aim to consume within 48 hours as the shells will gradually soften from the moisture of the filling.
- Prep Time: 15 minutes
- Cook Time: 20 minutes
- Method: Stovetop
- Cuisine: American
Nutrition
- Serving Size: 2 tacos
- Calories: 580
- Sodium: 750mg
- Fat: 33g
- Saturated Fat: 15g
- Unsaturated Fat: *(Note: % Daily Value is not standardized for Unsaturated Fat, Trans Fat, Sugars, or Protein on US nutrition labels.)*
- Trans Fat: 0g
- Protein: 3g


Leave a Comment