
Imagine a symphony of textures: the satisfying crunch, the gooey warmth of melted cheese, and tender, seasoned chicken all wrapped up in a golden tortilla. This isn’t just a meal; it’s a culinary hug that promises pure delight with every single bite. Get ready for the ultimateChicken Crunch Wrap (Crispy, Cheesy & Easy to Make)that will become your new favorite obsession. Ah, the memory of trying to recreate that fast-food marvel at home, only to discover it’s even better when you control the cheese factor and that perfect crispy crust. My first attempt was a glorious, albeit slightly messy, triumph that proved some things are just meant to be enjoyed homemade.
- Effortless Preparation:This recipe simplifies the art of the perfect crunch wrap, making a gourmet-style meal achievable even on your busiest weeknights.
- Unforgettable Flavor Profile:Experience a delightful blend of savory chicken, vibrant spices, and rich, melty cheeses, creating a truly irresistible taste sensation.
- Visually Appealing Delight:Golden-brown and beautifully layered, each wrap is a feast for the eyes, promising a delicious adventure before the first bite.
- Customizable Versatility:Easily adapt ingredients and fillings to suit your personal preferences, offering endless possibilities for creative culinary exploration.
You know that feeling when you’re craving something specific, something that hits all the right notes? Crispy, cheesy, meaty, and utterly satisfying? For me, that craving often leads to the legendary crunch wrap. But let’s be real, the drive-thru version, while a nostalgic treat, sometimes leaves a little to be desired. That’s where our homemadeChicken Crunch Wrap (Crispy, Cheesy & Easy to Make)steps in, ready to sweep you off your feet and right into flavor town. This isn’t just about copying a classic; it’s about elevating it to glorious, home-cooked perfection, without the mystery meat or the questionable assembly. Prepare yourself for a culinary adventure that promises to be both wildly delicious and surprisingly simple.
Why This Chicken Crunch Wrap is a Game-Changer
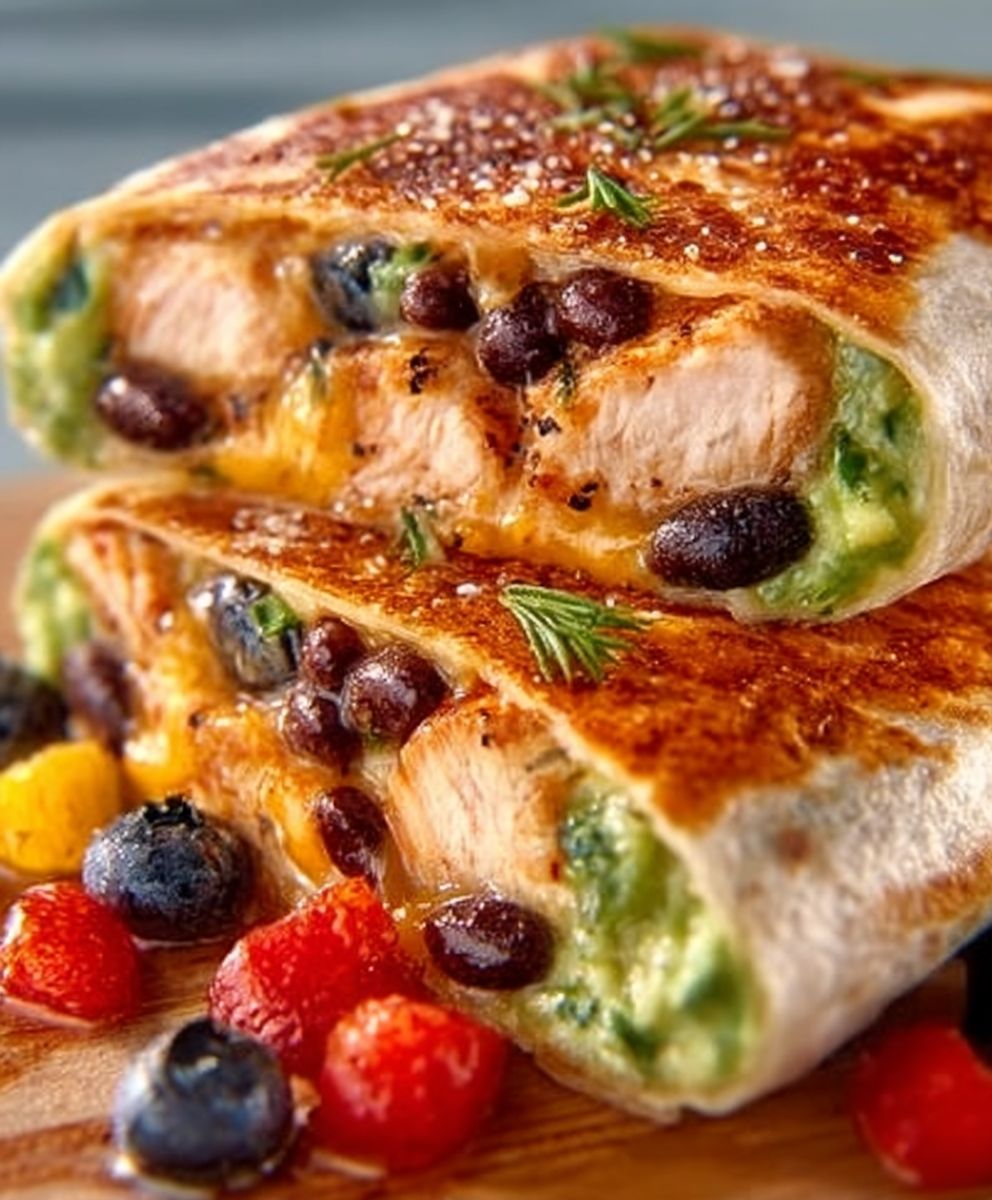
Forget everything you thought you knew about fast-food inspired meals. We are embarking on a journey to create a masterpiece that surpasses all expectations. Imagine biting into a perfectly toasted tortilla, yielding to a layer of gooey, melted cheese, followed by seasoned, tender chicken, and that oh-so-satisfying crunch from a toasted tortilla chip, all held together with your favorite fresh toppings. This isn’t just a meal; it’s an experience, a symphony of textures and flavors designed to make your taste buds sing. And the best part? You’re the conductor! No more sad, limp wraps; we’re going for gold, baby, pure crunchy gold.
The Origin Story (of My Obsession)
My journey with the crunch wrap began, like many epic tales, with a challenge. A friend dared me to recreate my favorite drive-thru item at home, insisting it couldn’t be done better. Oh, how wrong they were! Armed with a mountain of cheese, some ambitious chicken, and an unshakeable belief in the power of a hot skillet, I embarked on my quest. What started as a whimsical experiment quickly transformed into an all-consuming passion. The first attempt involved a bit too much cheese (is there such a thing, really?), a slightly uneven fold, and a frantic search for the perfect inner crunch. But the results, even then, were glorious. It tasted like victory, seasoned with extra cheese and a healthy dose of “I told you so.” From that day on, the homemade chicken crunch wrap became a staple, a testament to what a little creativity and a lot of cheese can achieve.
Why Homemade is Always Best
Beyond the sheer bragging rights of telling your friends you made that incredible crunch wrap, there are countless reasons why going homemade triumphs over the drive-thru. Firstly, you control the quality of your ingredients. Fresh, succulent chicken, real cheddar and mozzarella melting into a decadent pool, and vibrant, crisp lettuce and tomatoes – it all makes a world of difference. You can customize it to your heart’s content, adding extra spice if you dare, or loading up on your favorite veggies. No weird fillers, no mysterious sauces, just pure, unadulterated deliciousness crafted with love in your very own kitchen. Plus, the satisfaction of creating something this epic with your own two hands? Priceless.
Ingredients for Chicken Crunch Wrap (Crispy, Cheesy & Easy to Make)
Here’s what you’ll need to make this delicious dish:
- Large Flour TortillasOpt for tortillas at least 10-12 inches in diameter; these are essential for proper folding and containing all the delicious fillings.
- Small Flour TortillasUse smaller, 6-inch tortillas to create the signature crispy layer in the middle of your crunch wrap.
- Cooked Chicken BreastShredded or diced, ensuring it’s tender and seasoned. Leftover rotisserie chicken works wonderfully here for ease.
- Cheddar CheeseFreshly shredded cheddar melts beautifully and offers a sharp, tangy flavor that complements the chicken perfectly.
- Monterey Jack CheeseThis cheese adds a creamy texture and mild flavor, creating that irresistible gooey stretch in every bite.
- Cream CheeseA spoonful adds a rich, creamy dimension to your chicken mixture, ensuring it stays moist and flavorful.
- Taco SeasoningA good quality blend will infuse your chicken with authentic, zesty flavors. Adjust the amount to your spice preference.
- Salsa or Diced TomatoesChoose your favorite salsa for a burst of fresh, tangy flavor, or use plain diced tomatoes for a milder option.
- Sour Cream or Greek YogurtA dollop adds a cool, creamy contrast to the warm, spicy fillings, balancing the flavors.
- LettuceShredded lettuce provides a refreshing crunch and a cool element, cutting through the richness of the cheese and chicken.
- Crispy Tortilla Chips or Tostada ShellsThis is the secret to the “crunch”! Choose a sturdy chip or a small tostada for maximum textural impact.
- Vegetable OilJust a touch for pan-frying, ensuring your wrap achieves that perfect golden-brown crispness.
The full ingredients list, including measurements, is provided in the recipe card directly below.
How to Make Chicken Crunch Wrap (Crispy, Cheesy & Easy to Make)
Follow these simple steps to prepare this delicious dish:
Step 1: Prepare the Chicken Filling
In a medium bowl, combine your cooked, shredded chicken with cream cheese, half of the taco seasoning, and a couple of tablespoons of salsa or diced tomatoes. Mix until everything is well incorporated and the chicken is coated. This creates a rich, flavorful base for your crunch wrap. Taste and adjust seasoning as needed.
Step 2: Assemble the Layers
Lay a large flour tortilla flat on a clean surface. Spoon a layer of the seasoned chicken mixture onto the center, leaving ample space around the edges for folding. Sprinkle generously with shredded cheddar and Monterey Jack cheese over the chicken. Place a small flour tortilla directly on top of the cheese, then add your crispy tortilla chips or a tostada shell on top of the small tortilla for that essential crunch layer.
Step 3: Add Fresh Toppings
Around the crunchy layer, carefully spread a ring of sour cream or Greek yogurt. Follow this with a layer of shredded lettuce and the remaining salsa or diced tomatoes. Ensure these fresh ingredients are within the folding area of the large tortilla but not directly under the crunchy layer, to prevent sogginess.
Step 4: The Art of the Fold
Carefully fold the edges of the large tortilla towards the center, overlapping them to completely cover the fillings and the small tortilla. Continue folding around the circle until you have a tightly sealed hexagon. The goal is to create a compact, secure parcel that won’t burst open during cooking.
Step 5: Cook to Golden Perfection
Heat a large skillet or non-stick pan over medium heat with a tablespoon of vegetable oil. Once hot, carefully place the folded crunch wrap seam-side down in the pan. Cook for 3-4 minutes, or until golden brown and crispy. Gently flip the wrap and cook for another 3-4 minutes on the other side, or until golden and the cheese inside is gloriously melted. Adjust heat to prevent burning.
Step 6: Rest and Serve
Once both sides are beautifully golden and the cheese is bubbling, carefully remove theChicken Crunch Wrap (Crispy, Cheesy & Easy to Make)from the skillet. Let it rest for a minute or two before slicing in half. This short resting period allows the fillings to set slightly, making for a cleaner cut and preventing fillings from spilling out. Transfer to plates and serve immediately with extra salsa, guacamole, or your favorite hot sauce for the perfect finishing touch.
Tips for the Ultimate Chicken Crunch Wrap Experience
Crafting the perfect crunch wrap is less about following a rigid rulebook and more about embracing a bit of culinary flair and clever technique. Think of your kitchen as your personal crunch wrap laboratory, where delicious experiments lead to gastronomic breakthroughs. Getting that ideal balance of crispy, cheesy, and tender is key, and with a few insider tips, you’ll be a crunch wrap virtuoso in no time.
Achieving Maximum Crunch and Gooey Goodness
The “crunch” inChicken Crunch Wrap (Crispy, Cheesy & Easy to Make)isn’t just a suggestion; it’s a promise! For that truly satisfying snap, don’t skimp on your crispy layer. While sturdy tortilla chips work great, a small tostada shell delivers an even more robust crunch that holds up beautifully. When cooking, ensure your pan is hot enough to toast the tortilla to a deep golden brown but not so hot that it burns. Medium heat is your friend here, allowing the cheese ample time to melt into a luscious, gooey dream while the exterior becomes perfectly crisp. Don’t rush the process; patience will be rewarded with unparalleled textural bliss.
The Art of the Fold: Keeping it All Together
Folding the crunch wrap can feel like a delicate operation, akin to wrapping a highly anticipated present. The trick is to start with generous-sized large tortillas and to avoid overfilling the center. Begin folding the edges of the large tortilla over the small tortilla and fillings, working your way around the circle, creating small, overlapping pleats. Press down gently as you go to seal the edges. A tight fold ensures all that deliciousness stays tucked inside, preventing any messy cheese escapes during cooking. If your tortillas feel a bit stiff, a quick 10-second zap in the microwave can make them more pliable and easier to work with.
Flavor Boosters & Creative Variations
While our classic recipe is undeniably fantastic, feel free to unleash your inner chef and experiment. For an extra kick, add a pinch of smoked paprika or a dash of hot sauce to your chicken mixture. Want more veggies? Finely diced bell peppers or corn can be mixed into the chicken filling. Instead of chicken, consider using seasoned ground beef or even black beans for a different protein punch. A squeeze of fresh lime juice over the chicken after cooking can brighten the flavors wonderfully. Don’t be afraid to try different cheese combinations, like pepper jack for a spicy kick, or a blend of Mexican cheeses. The beauty of this dish lies in its versatility; it’s your canvas, so paint it delicious!
Frequently Asked Questions About Your Chicken Crunch Wrap
How do I prevent my wrap from getting soggy?
The key to a non-soggy crunch wrap lies in layering and timing. Ensure your crispy layer (tostada or chips) is placed directly above the chicken and cheese, creating a barrier. Also, add fresh, moist ingredients like lettuce and salsa after the crispy layer and just before folding, keeping them away from direct contact with the warm filling for too long. Cook immediately after assembly.
Can I prepare the filling ahead of time?
Absolutely! You can prepare the seasoned chicken and cheese mixture up to 2 days in advance and store it in an airtight container in the refrigerator. This makes assembly on a busy weeknight incredibly fast. Just add your fresh ingredients and crispy layer right before you plan to cook.
What are some good vegetarian alternatives for this recipe?
For a fantastic plant-based version, swap the chicken for seasoned black beans, refried beans, or a mixture of sautéed mushrooms and bell peppers. You can also use crumbled plant-based meat substitutes. Ensure your plant-based filling is well-seasoned to provide a rich flavor profile.
How long does a Chicken Crunch Wrap last in the fridge?
While best enjoyed fresh for maximum crispiness, a cookedChicken Crunch Wrap (Crispy, Cheesy & Easy to Make)can be stored in the refrigerator for up to 2-3 days. Reheat it in a dry skillet over medium heat or in a toaster oven for the best results, aiming to crisp up the exterior again.
There you have it – the ultimate guide to creating a crispy, cheesy, and incredibly easyChicken Crunch Wrap (Crispy, Cheesy & Easy to Make)right in your own kitchen. This recipe isn’t just about satisfying a craving; it’s about making mealtime an adventure, a joyous occasion filled with delightful textures and flavors. So go on, gather your ingredients, fire up that skillet, and prepare to impress your taste buds (and anyone lucky enough to share a bite). Happy crunching!
Ever had one of those evenings? The fridge is staring back at you with a blank, uninspired gaze, and the takeout menus are practically begging for your attention. You know the drill – a quick scroll through delivery apps, a momentary lapse of judgment, and suddenly you’ve spent a small fortune on something that will inevitably arrive lukewarm. Fear not, my fellow culinary adventurers! I’ve been there, done that, and probably spilled the evidence on my favorite pajamas. That very predicament led me down a delicious rabbit hole, a journey that culminated in the creation of the legendary Chicken Crunch Wrap (Crispy, Cheesy & Easy to Make). Consider it your culinary superhero, swooping in to save dinner and your wallet.
I remember one Tuesday, the kitchen looked like a crime scene from my previous, ambitious, but ultimately failed attempt at artisanal bread. The kids were circling, demanding “real” food, and my spouse was giving me that look—the one that says, “Please, just make something edible.” Desperate times call for delicious measures, and my mind started racing through the best parts of all my favorite comfort foods: the satisfying crunch, the melty cheese pull, the savory filling. What if I could combine them all into one glorious, handheld package? A culinary Frankenstein’s monster, but, you know, in a really, really good way.
That night, through a flurry of tortillas, shredded chicken, and more cheese than I’m willing to admit, the magic happened. The first bite was a revelation—a symphony of textures and flavors. Crispy tortilla shell, warm, seasoned chicken, gooey cheese, and a hint of zesty freshness. It wasn’t just food; it was an experience. The silence at the dinner table was deafening, a rare occurrence in our bustling household. My spouse even managed a “Whoa” between bites, and the kids, well, they asked for seconds, then thirds. That, my friends, is how you know you’ve struck gold. This isn’t just a recipe; it’s a game-changer, a weeknight savior, and frankly, a whole lot of fun to eat.
Why This Chicken Crunch Wrap is a Weeknight Warrior
This isn’t just another dinner recipe; it’s a strategic maneuver against the tyranny of boring weeknights. This Chicken Crunch Wrap delivers on all fronts: flavor, fun, and phenomenal ease. Forget complicated steps or exotic ingredients you’ll never use again. This dish relies on simple components transformed into something extraordinary. It’s perfect for busy parents, overwhelmed students, or anyone who believes that delicious food shouldn’t require a culinary degree. Plus, the interactive assembly makes it a fantastic activity for the whole family, even the notoriously picky eaters!
The Magic Behind the Crispy, Cheesy Layers
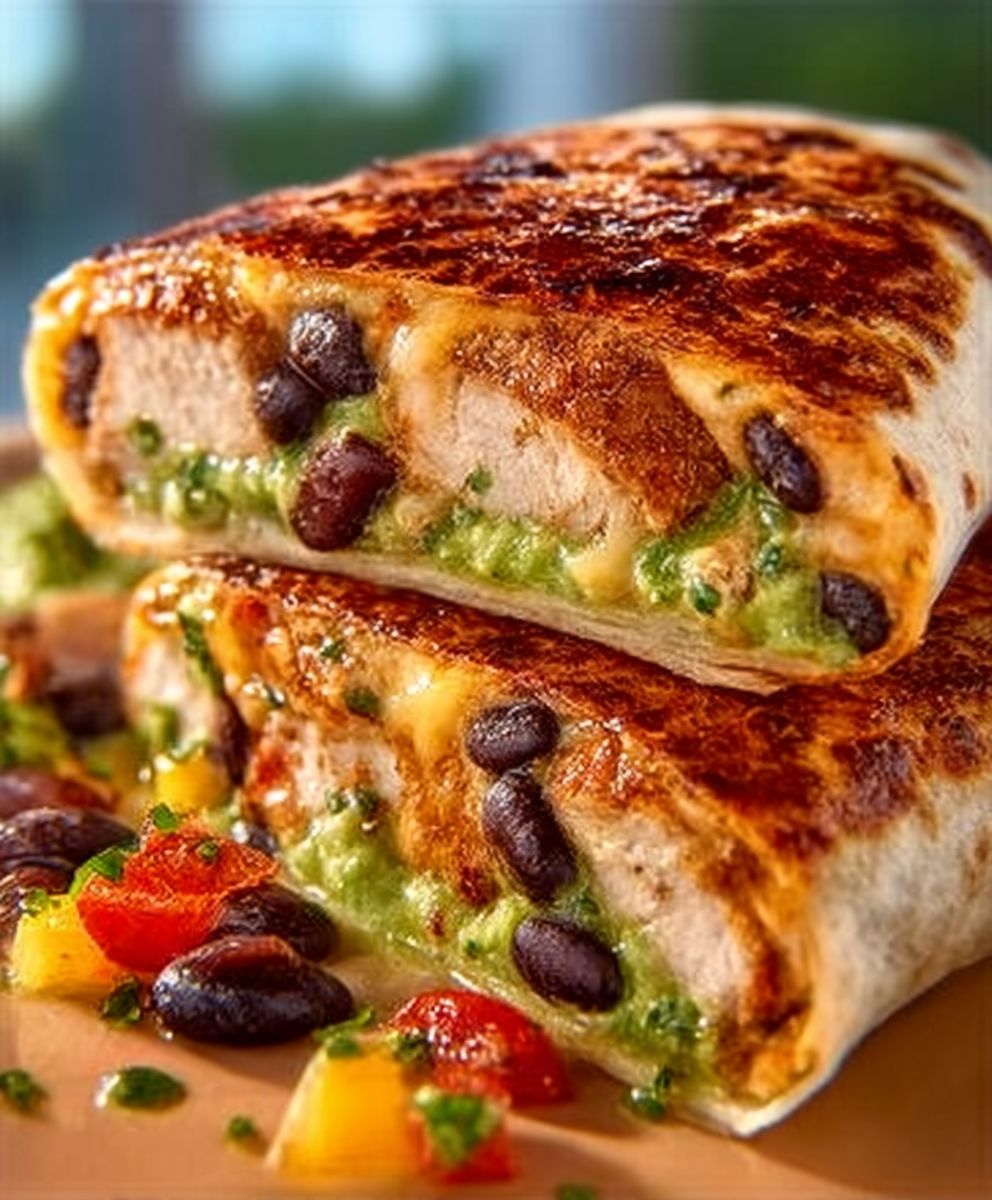
The secret to this Chicken Crunch Wrap’s undeniable appeal lies in its textural masterpiece. We start with a foundation of succulent, perfectly seasoned chicken, creating a flavorful core. Then, we introduce layers of creamy, dreamy cheese that melts into a gooey embrace, holding everything together. But the real star is the double-tortilla technique, which creates that incredible, satisfying crunch. It’s not just a wrap; it’s an architectural marvel of deliciousness, ensuring every single bite offers a harmonious blend of soft, savory, and gloriously crispy.
Gather Your Gear: Ingredients for the Ultimate Chicken Crunch Wrap
For the Flavor-Packed Chicken Filling:
- 1 tablespoon olive oil
- 1 pound boneless, skinless chicken breasts or thighs, cooked and shredded (about 3 cups)
- 1 small onion, finely diced
- 1 bell pepper (any color), finely diced
- 2 cloves garlic, minced
- 1 teaspoon cumin powder
- 1 teaspoon smoked paprika
- ½ teaspoon chili powder
- ¼ teaspoon dried oregano
- ½ cup chicken broth or water
- 2 tablespoons tomato paste
- Salt and black pepper to taste
- ¼ cup fresh cilantro, chopped (optional)
For Assembly & Crispy Perfection:
- 8 large (10-inch) flour tortillas
- 8 small (6-inch) flour tortillas
- 2 cups shredded cheddar cheese, Monterey Jack, or a blend
- ½ cup sour cream or plain Greek yogurt
- ¼ cup chopped green onions or chives (for garnish)
- Optional additions: diced tomatoes, jalapeño slices, a dollop of guacamole or salsa for serving
- Vegetable oil or cooking spray, for frying
Crunch Time! Step-by-Step Instructions
Prepare the Zesty Chicken Filling:
- Heat olive oil in a large skillet over medium heat. Add diced onion and bell pepper, sautéing until softened, about 5-7 minutes.
- Stir in minced garlic, cumin, smoked paprika, chili powder, and oregano. Cook for another minute until fragrant, stirring constantly.
- Add the shredded chicken, chicken broth (or water), and tomato paste to the skillet. Mix well to combine all ingredients, ensuring the chicken is thoroughly coated in the spices.
- Simmer for 5-7 minutes, allowing the flavors to meld and the sauce to thicken slightly. Season with salt and black pepper to your liking. Remove from heat and stir in the fresh cilantro, if using.
Assemble Your Masterpiece:
- Lay a large flour tortilla flat on a clean surface. Spread about 1 tablespoon of sour cream or Greek yogurt in the center.
- Spoon about ½ cup of the chicken filling onto the center of the large tortilla, on top of the sour cream.
- Sprinkle generously with about ¼ cup of shredded cheese over the chicken filling.
- Place a small flour tortilla directly over the cheese and chicken filling. This small tortilla helps contain the filling and creates that crucial extra layer for crunch.
- Now, here’s the fun part: carefully fold the edges of the large tortilla towards the center, overlapping them to completely enclose the small tortilla and the filling. Don’t be afraid to pull them taut to create a tight seal.
- Repeat the process with the remaining tortillas and filling until you have eight perfectly folded Chicken Crunch Wraps.
Get That Golden Crunch:
- Heat a large non-stick skillet or griddle over medium heat. Add a tablespoon of vegetable oil or spray generously with cooking spray.
- Carefully place a folded crunch wrap, seam-side down, into the hot skillet. Cook for 3-4 minutes per side, or until golden brown and crispy, and the cheese is beautifully melted. You might need to adjust the heat to prevent burning while ensuring even cooking.
- Remove the finished Chicken Crunch Wrap from the skillet and let it rest for a minute before slicing in half. This helps the cheese settle and prevents everything from spilling out.
- Serve immediately, garnished with chopped green onions, and with your favorite dips like salsa or guacamole. Prepare for a chorus of “oohs” and “aahs”!
Perfecting the Cooking Process
To achieve peak efficiency and flavor for your Chicken Crunch Wrap, always sear the chicken first, then shred it. While the chicken cools slightly, sauté your aromatics and build the sauce. This ensures your filling is piping hot and ready, allowing for quick assembly and a perfect, melty core in every crispy, cheesy bite.
Add Your Touch
Feel free to customize your Crispy Chicken Crunch Wrap! Swap chicken for seasoned ground beef or crumbled firm tofu for a different flair. Experiment with spices like smoked chipotle for a smoky kick, or add a squeeze of lime juice for brightness. Incorporate diced bell peppers or corn into the filling for extra texture and nutrition.
Storing & Reheating
Store any leftover Chicken Crunch Wraps in an airtight container in the refrigerator for up to 3 days. For best results when reheating, use an air fryer at 350°F (175°C) for 5-7 minutes, or bake in an oven at 375°F (190°C) for 10-15 minutes, until crispy and heated through. Microwaving may make them less crispy.
Okay, buckle up, aspiring crunch-wrap champions! I’ve been in the kitchen trenches for years, and these little nuggets of wisdom are like finding a twenty-dollar bill in an old coat. Trust me, they’ll elevate your Chicken Crunch Wrap from “good” to “glorious.”
- Don’t overcrowd the pan when cooking your Chicken Crunch Wrap. Cook them in batches to ensure even crisping and a perfectly golden-brown exterior.
- Ensure your chicken filling isn’t too wet. A drier filling prevents soggy tortillas and helps maintain that desirable crispy texture in your crunch wrap.
- Use a mix of cheeses for maximum flavor and melt. A combination of sharp cheddar and creamy Monterey Jack creates the ideal cheesy pull.
One time, my notoriously picky nephew, who usually treats new food like a suspicious alien artifact, devoured two of these Chicken Crunch Wraps. My sister declared it a miracle. That’s when I knew this recipe was a true keeper, a testament to crispy, cheesy goodness.
Why You’ll Adore This Crispy Chicken Crunch Wrap Recipe
What’s not to love about a handheld meal that packs this much punch? This Crispy Chicken Crunch Wrap isn’t just easy to make; it’s genuinely delightful. Imagine a perfect blend of savory chicken, oozing cheese, and a satisfying crunch in every single bite. It transforms simple ingredients into a meal that feels indulgent yet remains surprisingly straightforward. It’s the kind of dish that disappears quickly from the plate and leaves everyone craving more. Plus, the ability to customize the filling means you can tailor it to any taste preference, ensuring it becomes a regular star in your dinner rotation.
Perfect Pairings for Your Chicken Crunch Wrap
A Chicken Crunch Wrap (Crispy, Cheesy & Easy to Make) makes a fantastic standalone meal, but it truly shines when paired with a few simple sides. A fresh, vibrant green salad with a light vinaigrette cuts through the richness beautifully. For a touch of zing, serve alongside a zesty corn salsa or a bowl of creamy guacamole. A side of black beans or a simple tomato and cucumber salad also complements the flavors wonderfully, making for a well-rounded and satisfying meal.
Frequently Asked Questions About Your Chicken Crunch Wrap
Can I prepare the chicken filling ahead of time?
Absolutely! Preparing the chicken filling in advance is a fantastic time-saver. Cook the filling, let it cool completely, and then store it in an airtight container in the refrigerator for up to 3 days. When you’re ready to assemble, simply reheat the filling gently before building your Chicken Crunch Wrap.
What’s the secret to getting a truly crispy exterior?
The key to that irresistible crunch lies in two things: ensuring your pan is adequately hot (medium heat is perfect) and using enough oil or cooking spray. Don’t rush the process; let each side cook until it’s a deep golden brown. The small tortilla tucked inside also adds an extra layer of structural integrity for crispiness.
Are there vegetarian alternatives for this recipe?
Yes, absolutely! For a delicious vegetarian option, replace the chicken with seasoned black beans, crumbled firm tofu, or a hearty sautéed mushroom and bell pepper mix. Just ensure your chosen filling is not too wet to maintain the desired crispy texture of the Chicken Crunch Wrap.
How do I prevent the tortillas from tearing during folding?
To prevent tearing, ensure your large tortillas are at room temperature, making them more pliable. You can also briefly warm them in the microwave for 10-15 seconds to increase their flexibility. Don’t overfill the center, and fold the edges gently but firmly, overlapping them tightly to create a secure seal.
Conclusion for Chicken Crunch Wrap (Crispy, Cheesy & Easy to Make)
So there you have it, folks – the ultimate guide to mastering the Chicken Crunch Wrap (Crispy, Cheesy & Easy to Make)! We’ve journeyed from basic ingredients to a culinary masterpiece, proving that deliciousness doesn’t have to be complicated. This isn’t just a recipe; it’s an invitation to a fiesta in your mouth, a testament to the power of cheese, crunch, and perfectly seasoned chicken. Whether you’re whipping it up for a quick weeknight dinner or dazzling guests, remember: the joy is in the making, and the reward is that utterly satisfying, crispy bite. Go forth and crunch with confidence!
Print
Chicken Crunch Wrap (Crispy, Cheesy & Easy to Make)
- Total Time: 35 minutes
- Yield: 4 servings 1x
Description
Master the Chicken Crunch Wrap! Enjoy perfectly crispy layers, melty cheese, and savory chicken for an incredibly easy, satisfying meal. Full recipe and nutrition details await!
Ingredients
- 4 large (10-12 inch) flour tortillas
- 1.5 cups cooked chicken, shredded
- 4 tostada shells
- 1 cup Monterey Jack or Mexican blend cheese, shredded
- 1/2 cup sour cream
- 1/4 cup salsa (mild or medium)
- 1 cup shredded iceberg lettuce
- 1 tablespoon vegetable oil
Instructions
- Step 1: **Prepare your fillings.** In a small bowl, combine the shredded cooked chicken with the 1/4 cup of salsa. Set aside. Ensure your shredded cheese, sour cream, and shredded lettuce are all ready for assembly.
- Step 2: **Assemble the first layer.** Lay one large flour tortilla flat on a clean surface. Spread about 2 tablespoons of sour cream in the center of the tortilla, leaving a good 2-inch border around the edge. Spoon a quarter of the chicken mixture over the sour cream, then sprinkle with about 1/4 cup of shredded cheese.
- Step 3: **Add the "crunch" and final layers.** Carefully place one tostada shell directly over the chicken and cheese mixture. Spread another thin layer (about 1 tablespoon) of sour cream onto the tostada shell. Top this with a quarter of the shredded lettuce and a final light sprinkle of cheese.
- Step 4: **Fold and seal the wrap.** Carefully fold the edges of the large flour tortilla inwards over the tostada, working your way around and overlapping each fold until the entire filling is enclosed and sealed in the center. Press down gently to secure the folds. Repeat this process for the remaining three wraps.
- Step 5: **Cook until crispy.** Heat 1 tablespoon of vegetable oil in a large non-stick skillet or griddle over medium heat. Carefully place the crunch wrap seam-side down in the hot skillet. Cook for 3-4 minutes per side, or until golden brown and crispy, and the cheese inside is melted and gooey.
- Step 6: **Serve immediately.** Remove the finished crunch wraps from the skillet. Let them cool for just a minute or two before slicing in half (if desired) and serving hot.
Notes
- For best enjoyment, savor these crispy wraps immediately after cooking, but any cooled leftovers can be wrapped tightly and refrigerated for up to 2 days, though the tortilla will soften.
- To bring back some of that delightful crunch for refrigerated wraps, reheat them in an oven or air fryer at 350°F (175°C) for 10-15 minutes until warmed through and the exterior is crisp again.
- Serve these "Chicken Crunch Wraps" alongside a vibrant pico de gallo, a spoonful of creamy guacamole, or a zesty lime wedge to brighten every bite.
- For an easier and more secure fold, gently warm your large flour tortillas in the microwave for 10-15 seconds before assembly; this makes them more pliable and less likely to tear.
- Prep Time: 15 minutes
- Cook Time: 20 minutes
- Method: Stovetop
- Cuisine: American
Nutrition
- Serving Size: 1 large wrap (approx. 450g)
- Calories: 780
- Sodium: 1850mg
- Fat: 52g
- Saturated Fat: 15g
- Trans Fat: 0.5g
- Protein: 5g
FAQs
How can I ensure my Chicken Crunch Wrap (Crispy, Cheesy & Easy to Make) achieves peak crispiness?
The secret to that irresistible crunch in your Chicken Crunch Wrap lies primarily in two steps. First, don’t skimp on the oil in your pan when searing the wrap. A little extra healthy oil helps create a beautiful golden-brown crust. Second, and this is crucial, make sure your filling isn’t overly wet. Excess moisture is the enemy of crispiness! Cook down any sauces or ingredients to a thicker consistency. Finally, a moderate heat and a watchful eye during cooking will give you that glorious, satisfying crunch with every bite, ensuring your wrap is truly crispy and enjoyable.
Can I prepare parts of the Chicken Crunch Wrap ahead of time for a quicker meal?
Absolutely! The beauty of this easy-to-make wrap is its flexibility. You can cook the chicken filling a day or two in advance and store it in an airtight container in the refrigerator. Shredding the cheese, chopping vegetables, and even preparing any sauces can also be done ahead of time. This prep work transforms assembly into a lightning-fast process, perfect for busy weeknights or unexpected cravings. Just remember to warm the chicken filling slightly before wrapping to ensure everything cooks evenly and melts beautifully, creating a seamless and delicious experience.
What are some creative variations for the Chicken Crunch Wrap filling?
While the classic Chicken Crunch Wrap is a masterpiece, feel free to unleash your culinary creativity! Instead of plain chicken, consider a zesty lime chicken or a smoky barbecue chicken filling for a flavor twist. For added texture and nutrition, you could incorporate black beans, corn, or roasted bell peppers. Don’t be afraid to experiment with different cheese blends – a Monterey Jack and cheddar mix works wonders. You could even add a dollop of a vibrant avocado cream or a spicy jalapeño sauce. The possibilities are endless for customizing this easy-to-make delight!
How do I prevent my Chicken Crunch Wrap (Crispy, Cheesy & Easy to Make) from becoming soggy?
Sogginess is a tragedy we aim to avoid with our Chicken Crunch Wrap. The main culprit is often excess moisture from the filling or inadequate cooking. Ensure your chicken filling isn’t too saucy or watery; if it is, let it simmer a bit longer to thicken. Another trick is to place a barrier between the wet filling and the tortilla – a layer of cheese or even a small, crisp tostada can help significantly. When assembling, don’t overfill the wrap, as this can lead to uneven cooking and steam buildup. Finally, cook it immediately after assembly for the best crispy results.


Leave a Comment